寒假在家看完了导师给的文献 (真的水),重新拾起了自己在上学期上机时玩的 Qt,用的语言是 C++,因为 qt creator 在 Arch 下的界面极其的丑,缩放还有问题,所以转到了 VS Code 上写代码。中间遇到了不少问题,就在这里记录一下解决方法,还有 Qt 的学习所得。
又开了一个新坑
本文所有配置是在 Arch Linux 上进行的,Qt 版本为 5.15.2 现在变成 6.4.0了
C/C++ Extension PackQt tools
通过 pacman 安装的 qt 各种头文件已经在系统路径中了,无需做更改
在使用 qt creator 开发时,编辑器会读取 qt 的 ui 文件然后正确解析变量之间的关系。然而 VS Code 不会这么做,所以会出现 VS Code 无法正确理解存在 ui 文件中的变量及其关系。解决方案是使用 qt 提供的 uic 命令将 ui 文件转换成头文件。
这样 VS Code 中红红的报错就消失了。在 ui 文件发生更改后需要再执行命令更新头文件。
以下部分代码功能不完备,经我自己实践编写后已经另外重写了图片查看器代码
传送门
在 qt creator 中按照 文件 → 新建文件或项目 打开对话框,选择 Qt Widgets Application,名称和路径自定,构建系统 (Build system) 选择 CMake,Class name 同样自定,这里使用 ImageViewer。由于是学习目的,Translation 可以先跳过。之后的 Kits 和 版本控制 也可以先不选。
在使用 Qt 之前,需要先介绍一些概念,理解了这些概念之后,代码就容易看懂了。
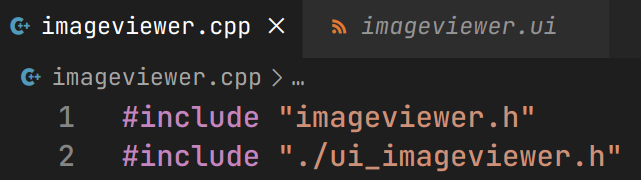
ui 文件可以直接在 qt creator 中进行编辑,这个文件对应了你所设计的程序的图形界面的布局。ui 文件使用的语言是 XML,但是 qt creator 会隐式的将其当作 .h 头文件来处理,这一点在创建的 imageviewer.cpp 中就可以看出来。
上图的 ui_imageviewer.h 就是 ui 文件代表的头文件,前面也提到过,VSCode 不会将 ui 看作是头文件,因此需要用 uic 命令转换 ui 文件。
在很多找到的教程里,都有提到 QAction 这个控件。其实,如果你是直接在 qt creator 编辑控件的话,没有必要再自己定义这个控件了 。所有添加到 ui 里的控件都会定义在 ui 头文件里面。在后面的代码中你会看到这一点。
槽函数,是 Qt 中一类特殊的函数。我的理解是,当你写好了一个槽函数,并将其绑定到一个控件上,在控件收到对应的信号后 (例如鼠标单击触发的 triggered 信号),便会调用对应的函数。槽函数的声明是写在对应类的 private slots 中。
在 imageviewer.h 中,你可以看到预先写好的 ImageViewer 类,所有函数的声明将写在这个类中。
对于槽函数:
需要 open 来执行打开图片的功能
需要 zoomIn、zoomOut 来执行缩放图片的功能
需要 normalSize 来执行将图片设置回原来大小的功能
需要 fitToWindow 来执行将图片设置为与窗口大小相同的功能
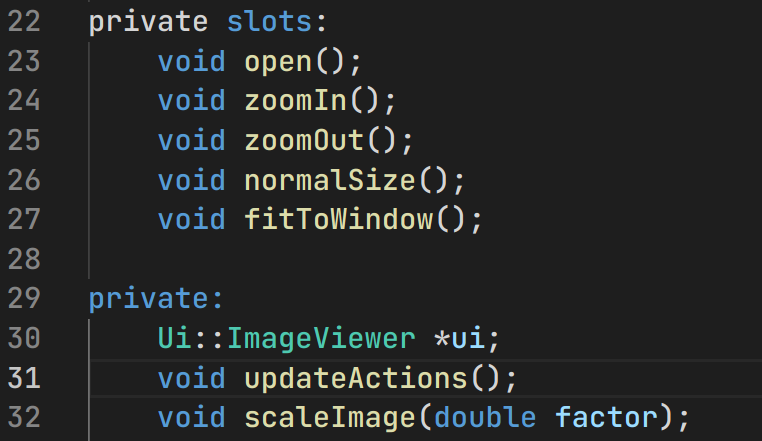
所以,在 private slots 中可以写为
1
2
3
4
5
6
private slots: void open () void zoomIn () void zoomOut () void normalSize () void fitToWindow ()
另外,我们还需要如下私有函数及变量:
updateActions() 来设置某个选项是否可触发,例如在没有打开图片的时候将 zoomIn、zoomOut、normalSize 和 fitToWindow 功能设置为不可触发。scaleImage() 来调整图片大小adjustScrollbar() 来调整滚动条ui 指针来获取窗口的指针,以进行后续操作scaleFactor 来记录图片的缩放比
以及如下公共函数:
ImageViewer() 析构函数与 ~ImageViewer() 解构函数,这个新建项目的时候会自动写好loadFile 来读取图片
最终整个文件如下
1 2 3 4 5 6 7 8 9 10 11 12 13 14 15 16 17 18 19 20 21 22 23 24 25 26 27 28 29 30 31 32 33 34 35 36 37 38 39 #ifndef IMAGEVIEWER_H #define IMAGEVIEWER_H #include <QMainWindow> #include <QScrollBar> #include <QLabel> #include <QScrollArea> QT_BEGIN_NAMESPACE namespace Ui{ class ImageViewer ; } QT_END_NAMESPACE class ImageViewer : public QMainWindow{ Q_OBJECT public : ImageViewer (QWidget *parent = nullptr ); bool loadFile (const QString &) ~ImageViewer (); private slots: void open () void zoomIn () void zoomOut () void normalSize () void fitToWindow () private : Ui::ImageViewer *ui; void updateActions () void scaleImage (double factor) void adjustScrollbar (QScrollBar *scrollBar, double factor) double scaleFactor = 1 ; }; #endif
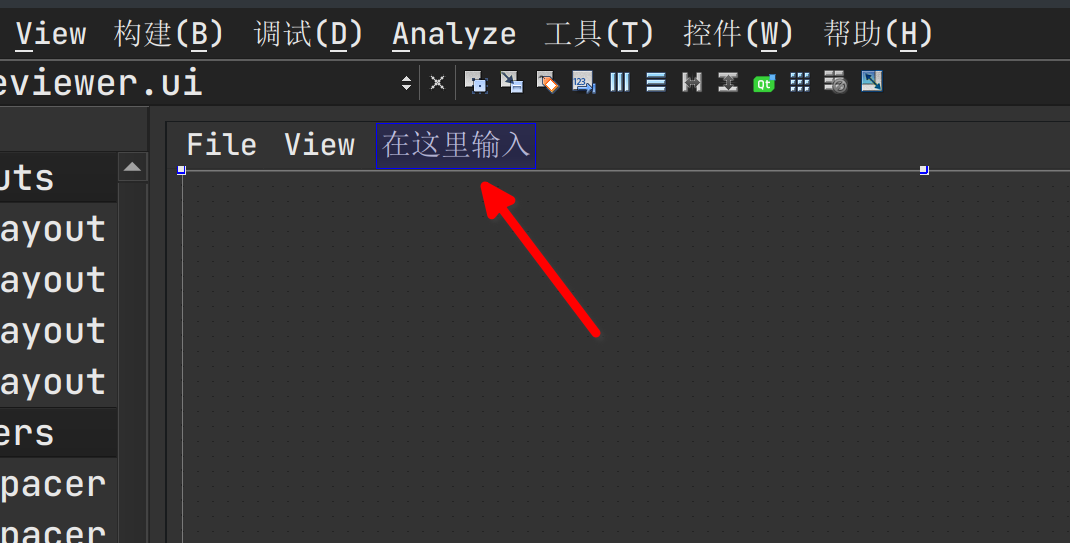
在真正的写函数之前,要把 UI 界面先设计好。其实很简单,用 qt creator 拖拉几个控件就好了。
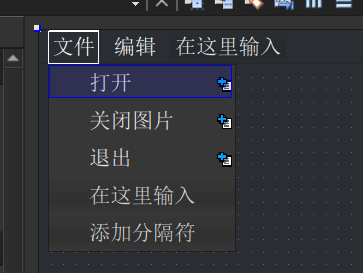
双击这个地方添加菜单和二级菜单
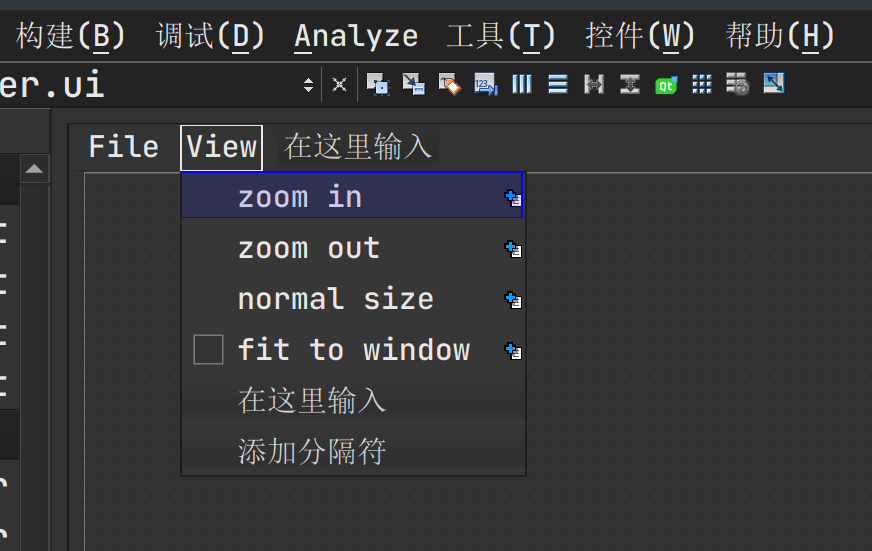
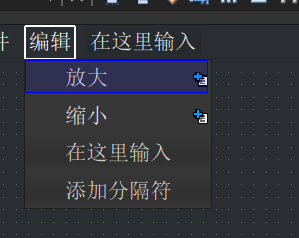
File 和 View 子菜单如下
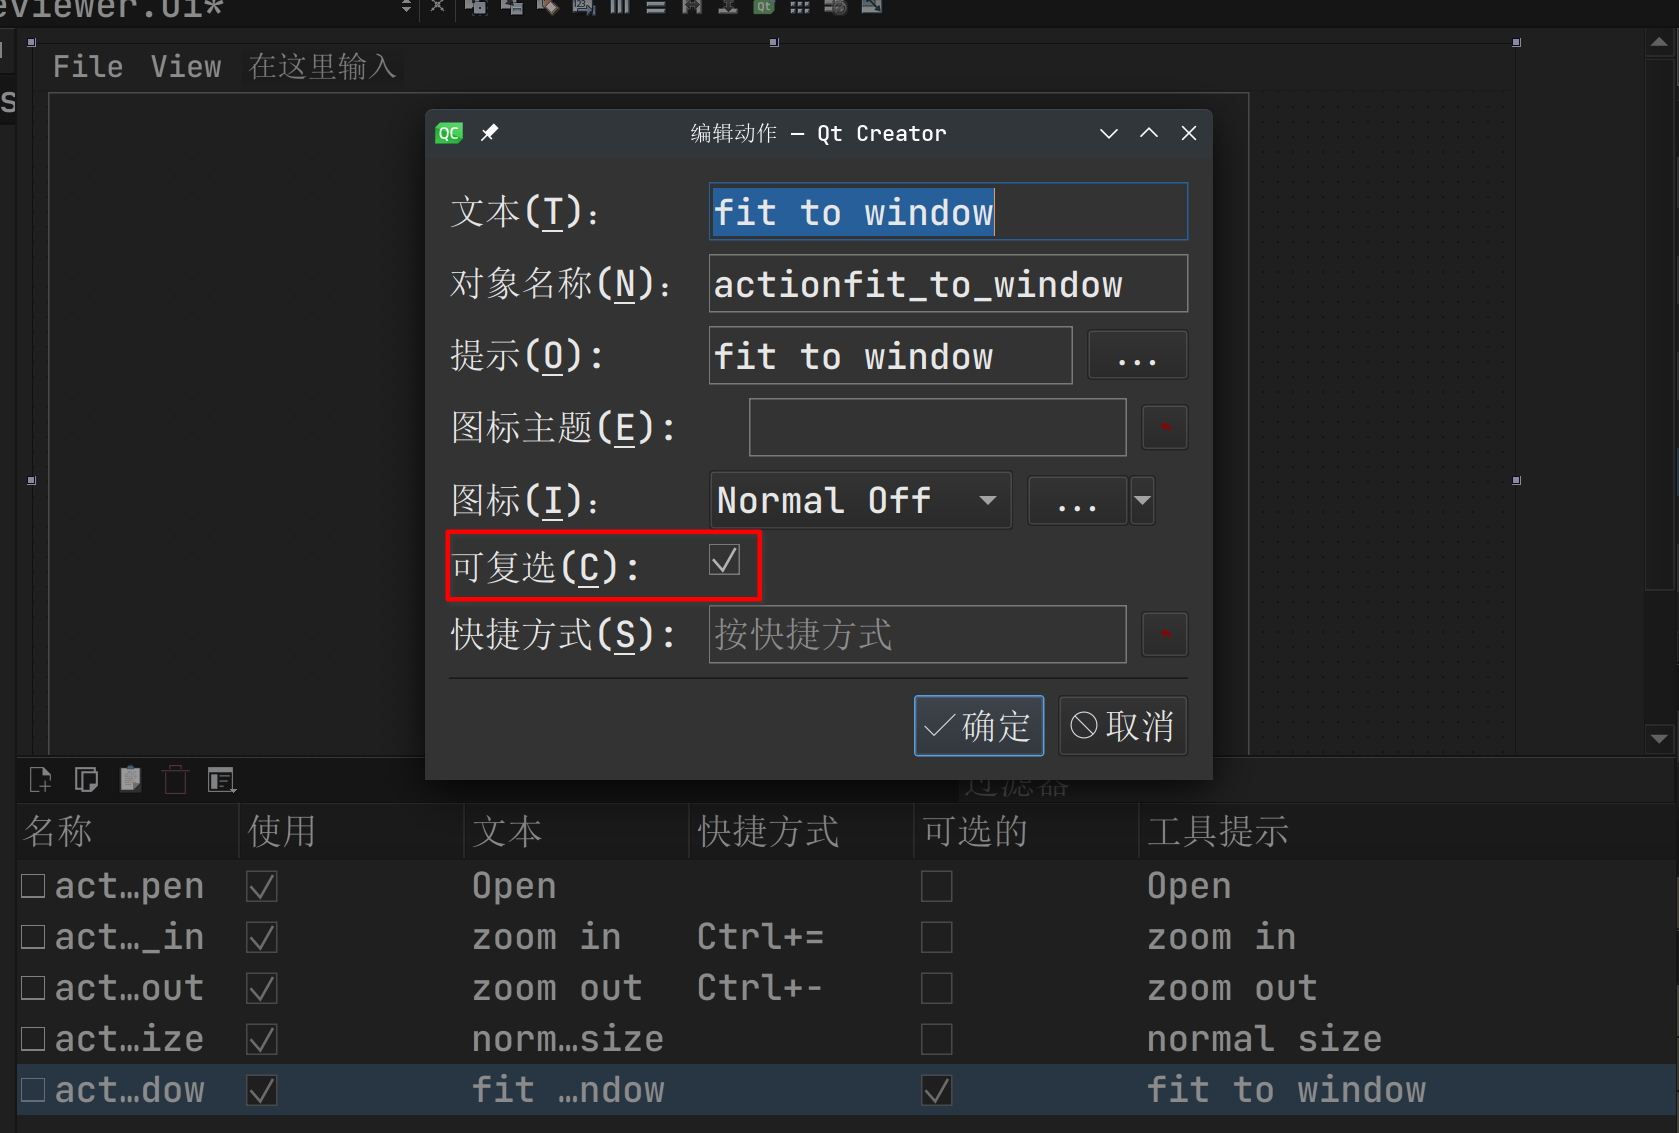
并且在下方设置一下 fit to window 的 action 使其可以被选中
然后在左边的控件栏里搜索 Scroll Area 和 Label 添加两个控件,Label 用来展示图片,Scroll Area 可以在其子控件过大时显示滚动条来以供通过滚动来显示子控件。将 Label 控件拖到 Scroll Area 控件内部,qt creator 会自动将其添加为 Scroll Area 的子控件。
ImageViewer
1 2 3 4 5 6 7 8 9 10 11 12 13 14 15 16 17 18 19 20 21 22 23 24 25 26 27 28 29 30 31 32 33 ImageViewer::ImageViewer (QWidget *parent) : QMainWindow (parent) , ui (new Ui::ImageViewer) { ui->setupUi (this ); ui->label->setBackgroundRole (QPalette::Base); ui->label->setSizePolicy (QSizePolicy::Ignored, QSizePolicy::Ignored); ui->label->setScaledContents (true ); ui->scrollArea->setBackgroundRole (QPalette::Dark); ui->scrollArea->setVisible (false ); setCentralWidget (ui->scrollArea); connect (ui->actionOpen, SIGNAL (triggered ()), this , SLOT (open ())); connect (ui->actionzoom_in, SIGNAL (triggered ()), this , SLOT (zoomIn ())); connect (ui->actionzoom_out, SIGNAL (triggered ()), this , SLOT (zoomOut ())); connect (ui->actionnormal_syize, SIGNAL (triggered ()), this , SLOT (normalSize ())); connect (ui->actionfit_to_window, SIGNAL (triggered ()), this , SLOT (fitToWindow ())); }
updateActions
1 2 3 4 5 6 7 8 9 void ImageViewer::updateActions () zoomInAct->setEnabled (!fitToWindowAct->isChecked ()); zoomOutAct->setEnabled (!fitToWindowAct->isChecked ()); normalSizeAct->setEnabled (!fitToWindowAct->isChecked ()); }
loadFile
1 2 3 4 5 6 7 8 9 10 11 12 13 14 15 16 17 18 19 20 21 22 23 24 25 26 27 28 bool ImageViewer::loadFile (const QString &filename) QImageReader reader (filename) ; reader.setAutoTransform (true ); const QImage newImage = reader.read (); if (newImage.isNull ()) { QMessageBox::information (this , QGuiApplication::applicationDisplayName (), tr ("Cannot load %1: %2" ) .arg (QDir::toNativeSeparators (filename), reader.errorString ())); return false ; } ui->label->setPixmap (QPixmap::fromImage (newImage));; scaleFactor = 1.0 ; ui->scrollArea->setVisible (true ); ui->actionfit_to_window->setEnabled (true ); updateActions (); if (!fitToWindowAct->isChecked ()) ui->label->adjustSize (); return true ; }
adjustScrollbar
1 2 3 4 5 6 7 8 9 void ImageViewer::adjustScrollbar (QScrollBar *scrollBar, double factor) scrollBar->setValue ( int (factor * scrollBar->value () + ((factor - 1 ) * scrollBar->pageStep () / 2 )) ); }
scaleImage
1 2 3 4 5 6 7 8 9 10 11 12 void ImageViewer::scaleImage (double factor) scaleFactor *= factor; ui->label->resize (scaleFactor * ui->label->pixmap (Qt::ReturnByValue).size ()); adjustScrollbar (ui->scrollArea->horizontalScrollBar (), factor); adjustScrollbar (ui->scrollArea->verticalScrollBar (), factor); zoomInAct->setEnabled (scaleFactor < 3.0 ); zoomOutAct->setEnabled (scaleFactor > 0.333 ); }
开发环境为 Qt6,UI 设计部分仅简略描述
文件菜单
编辑菜单
以及其对应的控件命名
控件名称
Action 名称
打开
action_open
关闭图片
action_close_image
退出
action_exit
放大
action_big
缩小
action_small
imageviewer.h
1 2 3 4 5 6 7 8 9 10 11 12 13 14 15 16 17 18 19 20 21 22 23 24 25 26 27 28 29 30 31 32 33 34 35 36 37 38 #ifndef IMAGEVIEWER_H #define IMAGEVIEWER_H #include <QMainWindow> QT_BEGIN_NAMESPACE namespace Ui { class ImageViewer ; }QT_END_NAMESPACE class ImageViewer : public QMainWindow{ Q_OBJECT public : ImageViewer (QWidget *parent = nullptr ); ~ImageViewer (); void resizeLabel (int height, int width) public slots: void showImage () void scaleBig () void scaleSmall () void clearLabel () protected : void resizeEvent (QResizeEvent* event) override private : Ui::ImageViewer *ui; int imageHeight = 10 ; int imageWidth = 10 ; float scale = 1 ; }; #endif
imageviewer.cpp
1 2 3 4 5 6 7 8 9 10 11 12 13 14 15 16 17 18 19 20 21 22 23 24 25 26 27 28 29 30 31 32 33 34 35 36 37 38 39 40 41 42 43 44 45 46 47 48 49 50 51 52 53 54 55 56 57 58 59 60 61 62 63 64 65 66 67 68 69 70 71 72 73 74 75 76 77 78 79 80 81 82 83 84 85 86 #include "imageviewer.h" #include "./ui_imageviewer.h" #include <iostream> #include <QFileDialog> ImageViewer::ImageViewer (QWidget *parent) : QMainWindow (parent) , ui (new Ui::ImageViewer) { ui->setupUi (this ); QObject::connect (ui->action_open, SIGNAL (triggered ()), this , SLOT (showImage ())); QObject::connect (ui->action_big, SIGNAL (triggered ()), this , SLOT (scaleBig ())); QObject::connect (ui->action_small, SIGNAL (triggered ()), this , SLOT (scaleSmall ())); QObject::connect (ui->action_close_image, SIGNAL (triggered ()), this , SLOT (clearLabel ())); } ImageViewer::~ImageViewer () { delete ui; } void ImageViewer::resizeEvent (QResizeEvent* event) QMainWindow::resizeEvent (event); resizeLabel (this ->imageHeight, this ->imageWidth); } void ImageViewer::resizeLabel (int imageHeight, int imageWidth) QSize test = ui->image_widget->size (); int imageLabelSide, imageLabelXStart, imageLabelYStart, imageLabelOtherSide; int flag = ((double )test.width () / test.height ()) > ((double )imageWidth / imageHeight) ? 0 : 1 ; if (flag) { imageLabelSide = (test.width ()) * this ->scale; imageLabelOtherSide = (imageLabelSide * imageHeight / imageWidth); imageLabelYStart = (test.height () - imageLabelOtherSide) / 2 ; imageLabelXStart = (test.width () - imageLabelSide) / 2 ; ui->image_label->move (imageLabelXStart, imageLabelYStart); ui->image_label->resize (imageLabelSide, imageLabelOtherSide); } else { imageLabelSide = test.height () * this ->scale; imageLabelOtherSide = (imageLabelSide * imageWidth / imageHeight); imageLabelXStart = (test.width () - imageLabelOtherSide) / 2 ; imageLabelYStart = (test.height () - imageLabelSide) / 2 ; ui->image_label->move (imageLabelXStart, imageLabelYStart); ui->image_label->resize (imageLabelOtherSide, imageLabelSide); } } void ImageViewer::showImage () QString qFileName = QFileDialog::getOpenFileName (this , "Open File" , "/home/syize" , "File (*)" ); ui->filename_label->setText (qFileName); QPixmap image = QPixmap (qFileName); ui->image_label->setPixmap (image); ui->image_label->setScaledContents (1 ); this ->imageHeight = image.size ().height (); this ->imageWidth = image.size ().width (); resizeLabel (image.size ().height (), image.size ().width ()); } void ImageViewer::scaleBig () this ->scale += 0.2 ; resizeLabel (this ->imageHeight, this ->imageWidth); } void ImageViewer::scaleSmall () this ->scale -= 0.2 ; resizeLabel (this ->imageHeight, this ->imageWidth); } void ImageViewer::clearLabel () ui->image_label->clear (); ui->filename_label->clear (); }
关于如何正确缩放图片,请看 这里
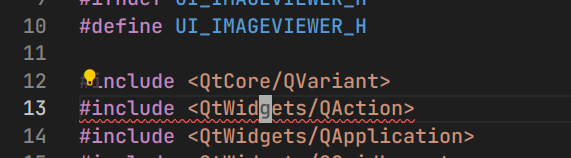
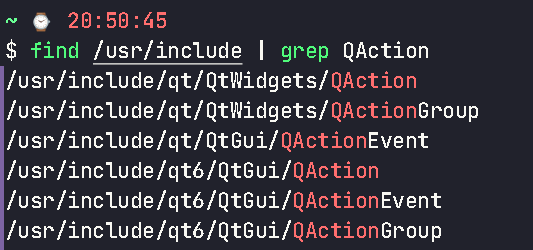
使用uic命令将ui文件转换成头文件以后,VS Code报错了。
查看了一下uic的版本是5.15.6,判断是qt5-base里面带的uic,因为我的Arch上同时存在qt5和qt6两个版本。
至于qt6的uic在哪里就不得而知了。经过对include路径搜索后发现,想要解决这个错误,需要将QtWidgets修改为QtGui。
还挺不方便的。


Comments